HP LaserJet, HP PageWide Enterprise - Set up HP ePrint via email
HP LaserJet, HP PageWide Enterprise - Set up HP ePrint via email
Introduction
HP ePrint via email is a feature included in select HP printer models that allows you to print documents or photos by emailing them directly to the web-connected HP printer. No printer driver or app is necessary. Simply email the documents from the device (laptop, tablet, smart phone, or other email-capable device) to an email address assigned to the printer.
This document explains what is required and how to set up and configure the HP ePrint via email feature.
For information on other ways to print, see Wireless printing from a laptop, phone, or tablet.
Requirements for printer and device
Review the following requirements for using HP ePrint via email:
-
The printer must have the HP ePrint via email feature. To check whether your printer model has this feature, go to Printers that can use mobile printing solutions.
-
The printer must be connected to a network with an active internet connection.
-
The mobile device or laptop must have email capability and internet access.
NOTE:
Although the printer must be connected to a network to set up or use HP ePrint via email, the laptop or mobile device does not need to be connected to the same network or to the printer in order to send print jobs.
Requirements for email programs
You can use any of the following email programs to send emails to the printer:
NOTE:The HP ePrint server will not accept email messages sent from private domains.
-
Outlook 2013, 2010, 2007, and 2003
-
Hotmail or MSN
-
Yahoo! Mail
-
Gmail
-
Apple Mail (iPhone, iPad, Macbook, or Macbook Pro)
-
BlackBerry email client
-
Nokia (Symbian) email client
Set up HP ePrint via email
After verifying the requirements, follow the steps below to set up HP ePrint via email.
Step one: Enable Web Services and get the printer claim code
Find your printer type in the options listed below, and then follow the steps provided to enable Web Services and get the printer claim code.
HP Enterprise printers
HP Enterprise printers are configured via the Embedded Web Server (EWS). If an administrator password has been set for the EWS, you will need the password to sign in to the EWS.
-
Find the printer IP address: From the Home screen on the printer control panel, touch the Information
 icon, and then touch the Ethernet
  icon to display the IP address or host name.
 -
Open a web browser. In the address line, enter the IP address or host name of the printer exactly as it displays on the printer control panel. Press the Enter key on the computer keyboard. The EWS opens.Figure : Example of an IP address in a browser window

NOTE:
If the web browser displays a message indicating that accessing the website might not be safe, select the option to continue to the website. Accessing this website will not harm the computer. -
Check the available tabs in the EWS. If only the Information tab is available in the EWS, you must sign in to gain access to the other tabs and settings. Click the Sign In button located in the upper-right corner of the page, and then sign in with the administrator password.
-
Select the HP Web Services tab, and then select the Enable Web Services button.
-
Select the Enable HP ePrint check box, and then select Apply.
-
Locate the printer claim code on the HP Web Services tab. You will use the printer claim code to register the printer with HP Connected.
HP LaserJet Pro printers - touchscreen control panel with white background
Follow these steps for printers that have a touchscreen control panel with a white display background.
-
From the Home screen on the printer control panel, swipe the tab at the top of the screen downward to open the Dashboard, and then touch the HP ePrint icon
 .
. -
On the HP ePrint screen, touch Setup in the lower right corner.
-
On the Setup Web Services screen, read the terms of use agreement, and then touch Yes to accept the terms and enable HP Web Services.The printer enables Web Services and prints an information page.
-
Locate the printer claim code on the printed information page. You will use the printer claim code in the next step to register the printer with HP Connected.
HP LaserJet Pro printers - touchscreen control panel with black background
Follow these steps for printers that have a touchscreen control panel with a black display background.
-
From the Home screen on the printer control panel, touch the Connection Information button
 .
. -
Open the following menus:
-
ePrint
-
Settings
-
Enable Web Services
-
-
Touch the Print button to read the terms of use agreement. Touch the OK button to accept the terms of use and enable HP Web Services.The printer enables Web Services and prints an information page.
-
Locate the printer claim code on the printed information page. You will use the printer claim code in the next step to register the printer with HP Connected.
HP LaserJet Pro printers - 2-line LCD control panel
Follow these steps for printers that have a 2-line LCD control panel with physical buttons to press.
NOTE:HP LaserJet Pro printers with a 2-line control panel are configured via the Embedded Web Server (EWS). If an administrator password has been set for the EWS, you will need the password to sign in to the EWS.
-
On the printer control panel, press the OK button.
-
Navigate to the printer IP address using one of the following paths (menu paths vary among printer models):
-
Open the Network Setup menu, and then select Show IP Address.
-
Select Setup, Network Setup, General Settings, Show the IP Address, and then Yes.
-
-
Open a web browser. In the address line, enter the IP address or host name of the printer exactly as it displays on the printer control panel. Press the Enter key on the computer keyboard. The EWS opens.Figure : Example of an IP address in a browser window
NOTE:
If the web browser displays a message indicating that accessing the website might not be safe, select the option to continue to the website. Accessing this website will not harm the computer -
Check the available tabs in the EWS. If only the Information tab is available in the EWS, you must sign in to gain access to the other tabs and settings. Click the Sign In button located in the upper-right corner of the page, and then sign in with the administrator password.
-
Enable web services using one of the following methods (steps vary among printer models):
-
Select the HP Web Services tab, and then select Enable.
-
Select the Web Services tab. In the Web Services Settings section, select Setup, select Continue, and then follow the onscreen instructions to accept the terms of use.
The printer enables Web Services and prints an information page. -
-
Locate the printer claim code on the printed information page. You will use the printer claim code in the next step to register the printer with HP Connected.
Step two: Create an account at HP Connected
You must register at HP Connected to obtain the email address unique to the printer. This email address is required to use ePrint via email.
-
Go to HP Connected and create an account.
-
Make sure to Accept Cookies in order to continue. To adjust cookie preferences before accepting, select Cookie Settings.
-
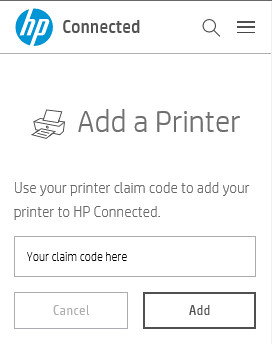
Type the printer claim code from the information sheet or Web Services Setup screen in the EWS and select Add.
-
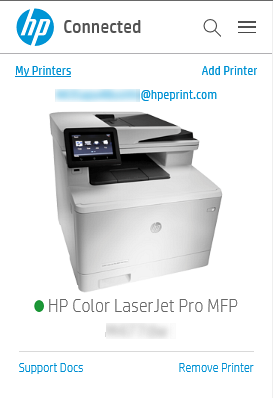
An email address is automatically generated and displayed above the printer image.
-
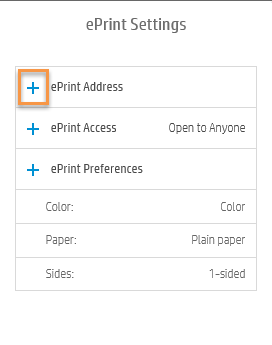
Follow these steps if you want to customize the email address (optional):
-
Click + next to ePrint Address in ePrint Settings.
-
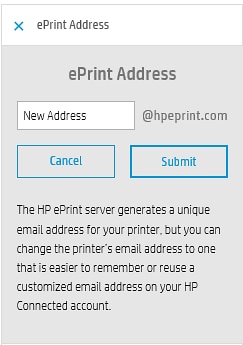
Type a new email address prefix (@hpeprint.com will stay the same), and select Submit.
-
HP LaserJet Pro printers: To view the updated email address, open Setup, open HP Web Services, and then select Display E-mail address.
-
Step three: Configure HP ePrint
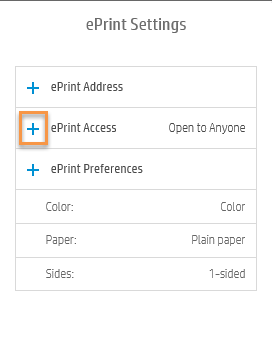
You can manage print jobs, change print settings, and adjust security with your new HP Connected account.
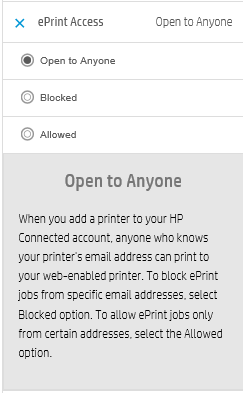
Customize users that can send ePrint jobs to the printer (optional)
HP Connected lets you control who can e-mail print jobs to your HP printer from mobile- or network-connected devices. To do this, follow these steps to assign Allowed Senders by creating an Allowed Senders list:
-
Log into your HP Connected account at HP Connected.
-
Under ePrint Settings, click + next to ePrint Access.
-
To add a list of blocked senders, select Blocked, or to add a list of allowed senders, select Allowed.
-
Type or paste an email address one at a time and then select Add.

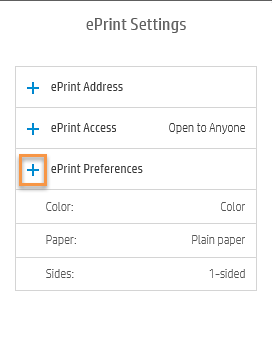
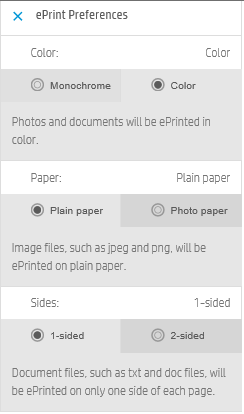
Change default print settings (optional)
To customize or reconfigure default print settings for all ePrint jobs sent to this printer, follow these steps:
-
Go to HP Connected, and log into your account.
-
Under ePrint Settings, click + next to ePrint Preferences.
-
Modify the settings.
https://support.hp.com/


Comments
Post a Comment